
Picture this: You’re carefully working on a sensitive circuit board when suddenly, a tiny spark jumps from your finger to the component. That seemingly harmless static discharge just cost you hours of work and potentially hundreds of dollars in damaged electronics. Electrostatic discharge (ESD) is the silent killer of electronic components, and without proper grounding techniques, even the most skilled engineer can fall victim to its destructive power.
Setting up an effective ESD work area isn’t just about buying expensive equipment—it’s about understanding how to properly connect and ground your station, mat, and wrist strap to create a unified protection system. When done correctly, this setup can save you from costly mistakes and ensure your projects succeed every time.
Key Takeaways
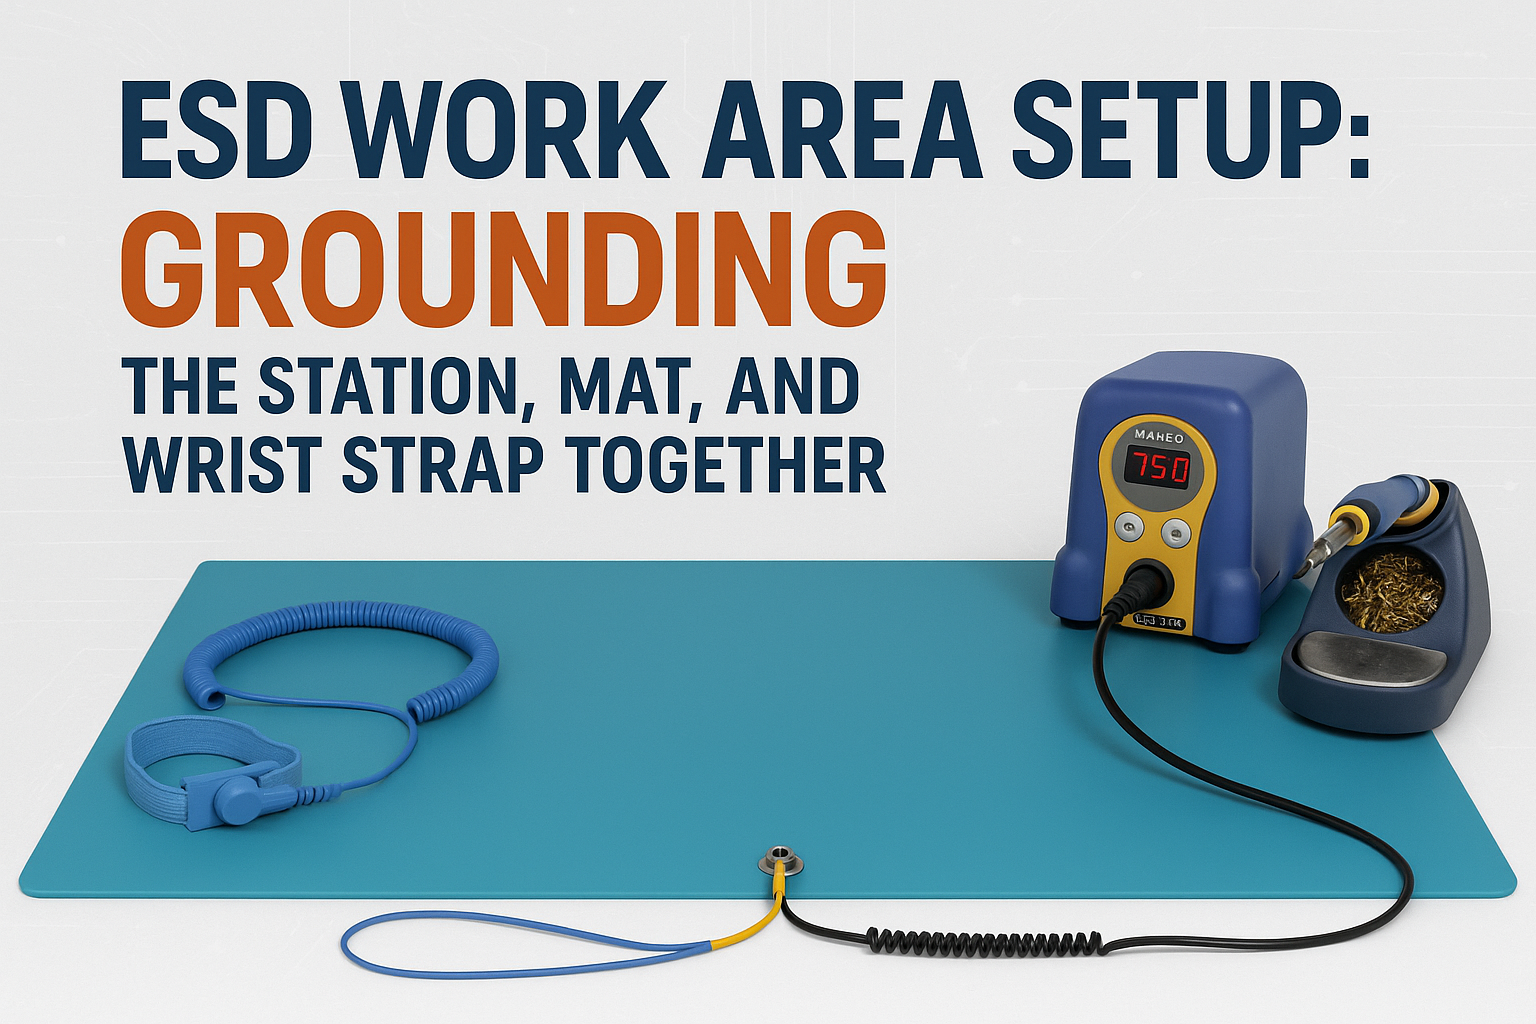
• Proper grounding creates a unified ESD protection system that safely dissipates static charges before they can damage sensitive components
• All ESD equipment must share a common ground point to ensure electrical continuity and prevent potential differences between surfaces
• Wrist straps provide personal grounding while anti-static mats protect components and tools on your work surface
• Regular testing and maintenance of your ESD setup is crucial for ongoing protection and safety
• Understanding resistance values helps you choose the right equipment and verify proper operation
Understanding ESD and Why Grounding Matters
Electrostatic discharge occurs when two objects with different electrical potentials come into contact. In electronics work, this can happen when you touch a component after walking across carpet or simply moving around your workspace. The human body can accumulate charges of 25,000 volts or more, yet it only takes as little as 10 volts to damage sensitive electronic components.
Modern electronics are particularly vulnerable because they use smaller geometries and lower operating voltages. Components that were once robust enough to handle minor static discharges are now destroyed by charges so small you can’t even feel them.
The Science Behind ESD Protection
ESD protection works on a simple principle: provide a controlled path for static charges to dissipate safely. Instead of allowing charges to build up and discharge suddenly through sensitive components, a properly grounded ESD system creates a gentle, continuous path to ground.
This is where the concept of controlled resistance becomes crucial. ESD protection equipment uses specific resistance values—typically between 1 megohm and 1,000 megohms—to allow static charges to dissipate slowly while preventing dangerous currents from flowing in case of accidental contact with live electrical circuits.
Essential Components of an ESD Work Area
Before diving into the setup process, let’s examine the three critical components that form the foundation of any effective ESD work area.
1. ESD Work Surface Mat
The anti-static mat serves as your primary work surface and provides protection for components, tools, and circuit boards. These mats are typically made from materials like vinyl or rubber with conductive properties that allow static charges to dissipate evenly across the surface.
Key features to look for in an ESD mat:
- Dissipative surface resistance between 10⁶ and 10⁹ ohms
- Durable construction that resists cuts, chemicals, and heat
- Proper size to accommodate your typical projects
- Grounding snap or terminal for electrical connection
2. Wrist Strap System
A wrist strap provides personal grounding by creating a continuous electrical connection between your body and the common ground point. This prevents you from accumulating static charges as you move around your workspace.
Essential wrist strap features include:
- Adjustable, comfortable band with conductive threads
- Inline resistor (typically 1 megohm) for safety
- Reliable connection system with banana plugs or alligator clips
- Coiled cord that allows freedom of movement
3. Grounding System
The grounding system ties everything together by providing a common reference point for all ESD protection equipment. This typically includes:
- Common ground bus or grounding block
- Earth ground connection to building electrical system
- Monitoring equipment to verify proper operation
- Distribution points for multiple devices
Step-by-Step ESD Work Area Setup
Now let’s walk through the process of properly setting up and grounding your ESD work area. Following these steps ensures maximum protection and safety.
Step 1: Establish Your Earth Ground Connection
Start by identifying a reliable earth ground connection. This is typically:
- The ground terminal of a properly wired electrical outlet
- A dedicated earth ground rod (for professional installations)
- The chassis ground of grounded equipment
⚠️ Safety Note: Never use the neutral wire of an electrical outlet as a ground connection. Always verify that your chosen ground point is actually connected to earth ground using a multimeter or ground tester.
Step 2: Install the Common Ground Bus
Set up a common ground bus or grounding block near your work area. This central point will connect all your ESD equipment together. Many commercial ESD systems include a ground bus with multiple connection points for different devices.
The ground bus should be:
- Easily accessible for connecting multiple devices
- Securely mounted to prevent accidental disconnection
- Connected to earth ground through a high-quality ground wire
Step 3: Connect Your ESD Mat
Connect your anti-static mat to the common ground bus using the provided ground cord. Most mats include a snap connector that attaches to a designated point on the mat’s surface.
Important considerations:
- Ensure the connection point is clean and free from oxidation
- Use the shortest practical ground wire to minimize resistance
- Test the connection with an ESD meter or multimeter
- Position the mat to cover your primary work area completely
Step 4: Set Up Your Wrist Strap Connection
Connect your wrist strap to the common ground bus or to a dedicated connection point on your ESD mat (if provided). Many professional setups include wrist strap monitors that continuously verify proper connection and resistance.
Key setup points:
- Adjust the strap for a snug but comfortable fit
- Ensure skin contact with the conductive elements
- Test the complete circuit from your wrist to ground
- Consider using a dual-wire wrist strap for redundancy
Step 5: Integrate Your Soldering Station
If you’re using a soldering station, it should also be connected to your ESD grounding system. Many modern stations include ESD-safe designs with grounded tips and chassis connections.
For ESD safety on your soldering station, ensure:
- The station chassis is grounded to your common ground bus
- The soldering tip is electrically connected to ground through the station
- Temperature control systems don’t interfere with grounding
- Any additional accessories (tip cleaners, flux dispensers) are also grounded
Testing and Verification Procedures
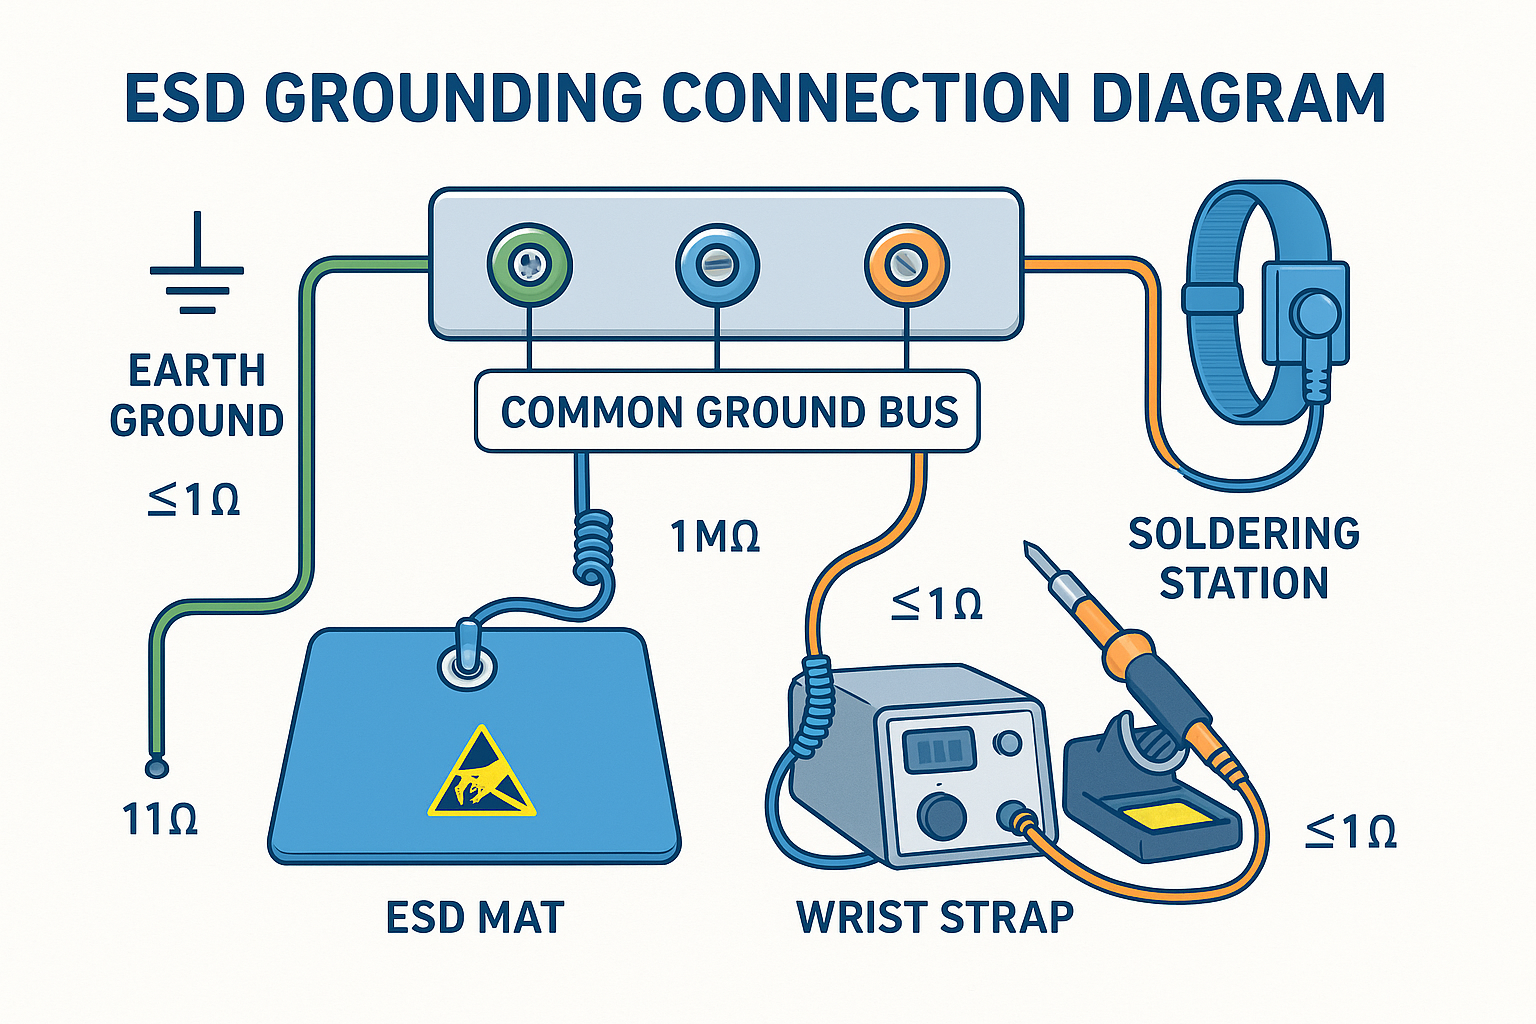
Setting up your ESD work area is only half the battle—you must also verify that everything is working correctly. Regular testing ensures ongoing protection and helps identify problems before they cause damage.
Resistance Testing
Use a megohm meter or specialized ESD tester to verify resistance values throughout your system:
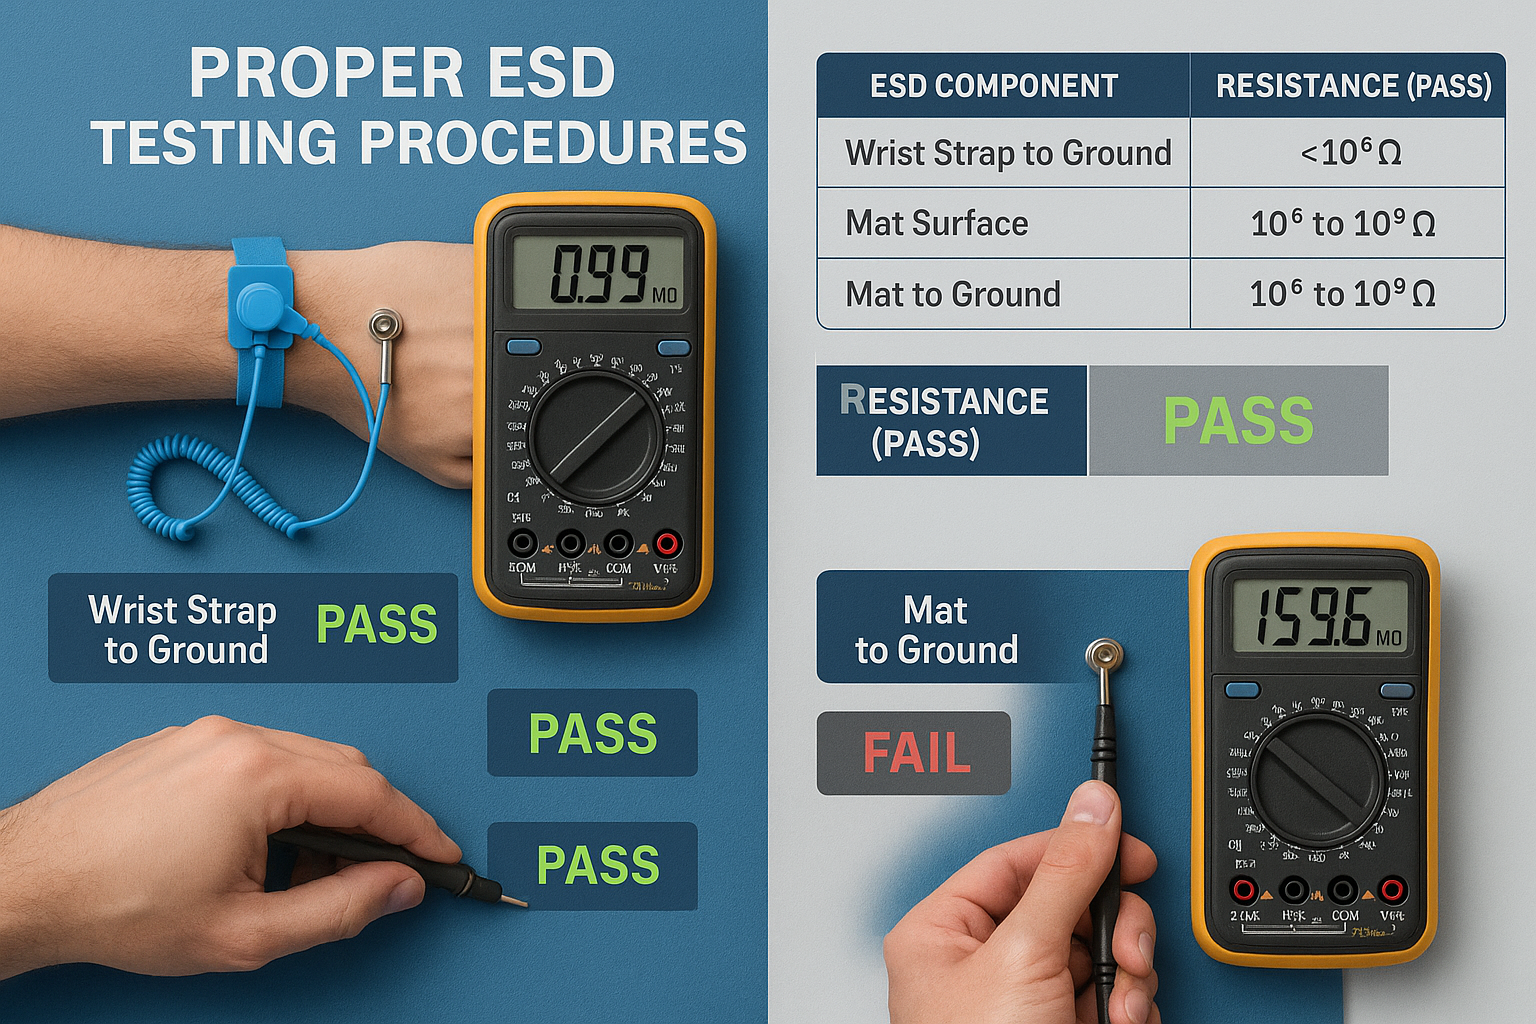
| Component | Acceptable Resistance Range |
|———–|—————————-|
| Wrist strap (person to ground) | 1-10 megohms |
| Mat surface resistance | 1-1000 megohms |
| Mat to ground resistance | < 1 megohm |
| Person + wrist strap to mat | < 35 megohms |
Continuity Verification
Check that all connections provide reliable electrical continuity:
- Visual inspection of all connection points
- Resistance measurement from each component to ground
- Functional testing with ESD event simulators
- Documentation of test results for quality records
Daily Operational Checks
Implement a simple daily verification routine:
- Visual inspection of all cables and connections
- Wrist strap test using a built-in or external tester
- Mat surface cleaning to remove contamination
- Ground connection verification at the main bus
Common Setup Mistakes and How to Avoid Them
Even experienced engineers can make mistakes when setting up ESD protection. Here are the most common errors and how to prevent them:
Mistake 1: Mixing Ground References
Problem: Connecting some equipment to building ground and others to equipment ground creates potential differences that can cause ESD events.
Solution: Use a single common ground point for all ESD equipment and verify it’s properly connected to earth ground.
Mistake 2: Ignoring Resistance Values
Problem: Using standard electrical wire or low-resistance connections can create safety hazards if you accidentally contact live circuits.
Solution: Always use properly rated ESD equipment with appropriate resistance values for both safety and ESD protection.
Mistake 3: Inadequate Surface Coverage
Problem: Placing components or tools on unprotected surfaces defeats the purpose of your ESD protection.
Solution: Ensure your anti-static mat covers the entire work area and use additional mats or conductive surfaces as needed.
Mistake 4: Poor Maintenance
Problem: Contaminated surfaces, loose connections, and worn equipment gradually reduce protection effectiveness.
Solution: Implement regular cleaning and testing schedules to maintain optimal performance.
Advanced ESD Work Area Considerations
For professional environments or critical applications, consider these advanced features:
Ionization Systems
Air ionizers neutralize static charges in the air around your work area, providing additional protection for sensitive components. These systems are particularly useful when working with:
- Extremely sensitive devices (sub-10V damage thresholds)
- Large circuit boards that extend beyond mat coverage
- Automated assembly equipment where human grounding isn’t practical
Environmental Monitoring
Humidity and temperature control significantly affects static generation. Maintaining 40-60% relative humidity dramatically reduces static buildup, while temperature control prevents condensation that can damage equipment.
Multiple Work Station Coordination
In facilities with multiple ESD work stations, ensure:
- All stations share common grounding infrastructure
- Consistent procedures across all work areas
- Regular auditing of all stations for compliance
- Training programs for all personnel
Maintenance and Long-Term Care
Your ESD protection system requires ongoing maintenance to remain effective. Develop a maintenance schedule that includes:
Weekly Tasks
- Clean mat surfaces with appropriate ESD-safe cleaners
- Inspect all cables for damage or wear
- Test wrist strap functionality with calibrated equipment
- Verify ground connections are secure
Monthly Tasks
- Complete resistance testing of all components
- Calibrate testing equipment according to manufacturer specifications
- Document all measurements for trend analysis
- Replace worn components as needed
Annual Tasks
- Professional system audit by qualified ESD technician
- Update procedures based on new standards or equipment
- Staff training refresh on proper ESD practices
- Equipment replacement planning for aging components
When setting up your ESD work area, choosing the right soldering station is crucial for maintaining proper grounding throughout your work. Consider investing in a quality XYTRONIC soldering station that includes built-in ESD protection features and reliable grounding connections.
Integration with Soldering Workflows
Your ESD setup should seamlessly integrate with your normal soldering workflows. For guidance on optimizing your soldering station setup, consider how different user types—hobbyists, repair technicians, and educators—might need different ESD configurations.
Key integration points include:
- Component preparation areas with full ESD protection
- Tool storage on conductive surfaces
- Work-in-progress storage with continued ESD protection
- Quality control stations with identical grounding setups
Understanding temperature control principles also helps ensure your ESD protection doesn’t interfere with proper soldering techniques.
Troubleshooting Common Issues
When your ESD system isn’t working properly, systematic troubleshooting can quickly identify the problem:
High Resistance Readings
- Check for corroded connections at snap points
- Verify wrist strap continuity through the resistor
- Look for contamination on mat surfaces
- Test ground path integrity to earth ground
Intermittent Connections
- Inspect cable flexing points for internal breaks
- Check snap connector wear and replace if necessary
- Verify ground bus connections are tight
- Look for environmental factors affecting connections
ESD Events Despite Protection
- Verify all components share common ground
- Check for ungrounded conductive surfaces in work area
- Ensure proper humidity levels (40-60% RH)
- Test for electromagnetic interference from nearby equipment
For comprehensive guidance on ESD safety fundamentals, including proper grounding techniques, refer to our detailed safety guide.
Cost-Benefit Analysis of Proper ESD Setup
While setting up a proper ESD work area requires initial investment, the cost of not having protection far exceeds the setup costs:
Setup Costs (One-time)
- ESD mat and accessories: $50-200
- Wrist strap and tester: $25-100
- Grounding hardware: $30-150
- Testing equipment: $100-500
- Total initial investment: $205-950
Potential Damage Costs (Per incident)
- Component replacement: $1-1000+ per device
- Rework time: $50-500 in labor costs
- Project delays: $100-10,000+ in missed deadlines
- Customer satisfaction: Immeasurable long-term impact
The math is clear: proper ESD protection pays for itself with the first prevented failure.
Future-Proofing Your ESD Setup
As electronics continue to become more sensitive and your projects grow in complexity, ensure your ESD setup can adapt:
Scalability Considerations
- Modular grounding systems that can expand
- Standardized connection types for easy upgrades
- Documentation systems that support growth
- Training programs that scale with team size
Technology Evolution
- Smart monitoring systems with remote alerts
- Automated testing equipment for consistent verification
- Integration with quality management systems
- Data logging capabilities for compliance documentation
Conclusion
Setting up an effective ESD work area by properly grounding your station, mat, and wrist strap together is one of the most important investments you can make in your electronics work. The key to success lies in understanding that all components must work together as a unified system, sharing a common ground reference and maintaining proper electrical continuity.
Remember these critical points:
- Start with a reliable earth ground connection as your foundation
- Use a common ground bus to connect all ESD equipment
- Test regularly to ensure ongoing protection
- Maintain your equipment to preserve effectiveness over time
- Integrate ESD protection into your normal workflow processes
The small investment in time and equipment to set up proper ESD protection will save you countless hours of rework, hundreds or thousands of dollars in damaged components, and the frustration of mysterious circuit failures. Whether you’re a professional engineer working on cutting-edge designs or a hobbyist building your latest project, proper ESD protection is not optional—it’s essential.
Take action today: assess your current ESD setup, identify any gaps in protection, and implement the grounding techniques outlined in this guide. Your future self (and your components) will thank you for the investment in proper ESD protection.
For more insights on electronics safety and best practices, explore our comprehensive blog covering everything from basic safety to advanced techniques.